How to configure proxy IP on iPad?
JasonBen 2024-08-22 16:47
When you use iPad to surf the Internet, you will want to get more resources, usually you can use Proxy IP. Configuring Proxy IP on iPad will give you a fresher experience, whether it’s to protect privacy and security, or to access geo-restricted content. How to configure proxy IP on iPad is not a complicated task, follow the steps below to unlock new skills.
What is a Proxy IP on iPad?
The proxy IP is a proxy server that hides the real IP address of the iPad. When the proxy IP address is configured on the iPad, the request from the iPad will be accepted by the proxy server and then sent to the target website. In this process, the real IP address of the iPad will not be displayed, which effectively protects the user’s privacy.
How to configure proxy IP on iPad?
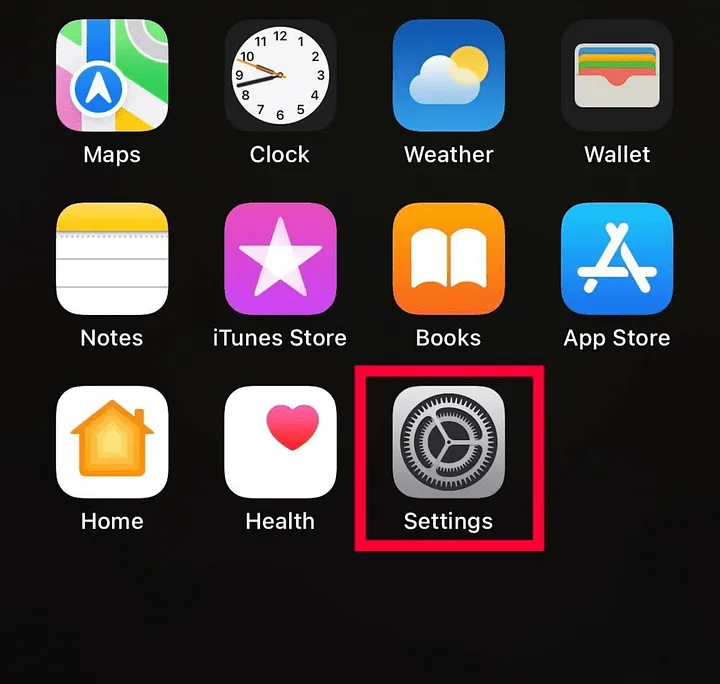
Step 1: Visit “Settings” on your iPad.
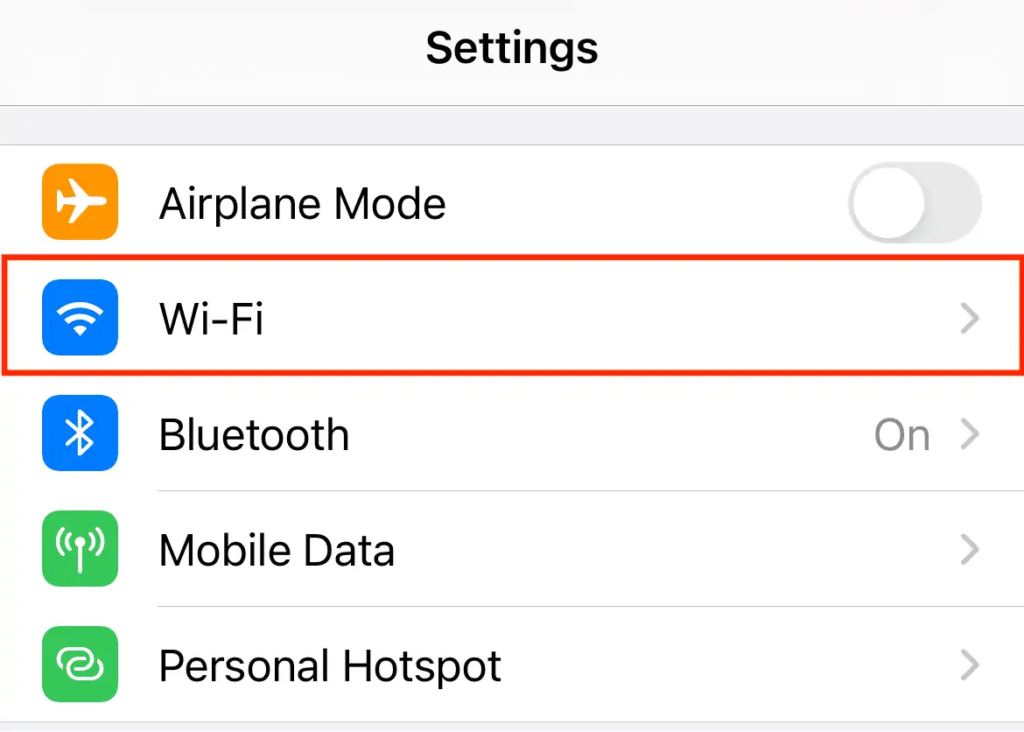
Step 2: Select “WiFi”.
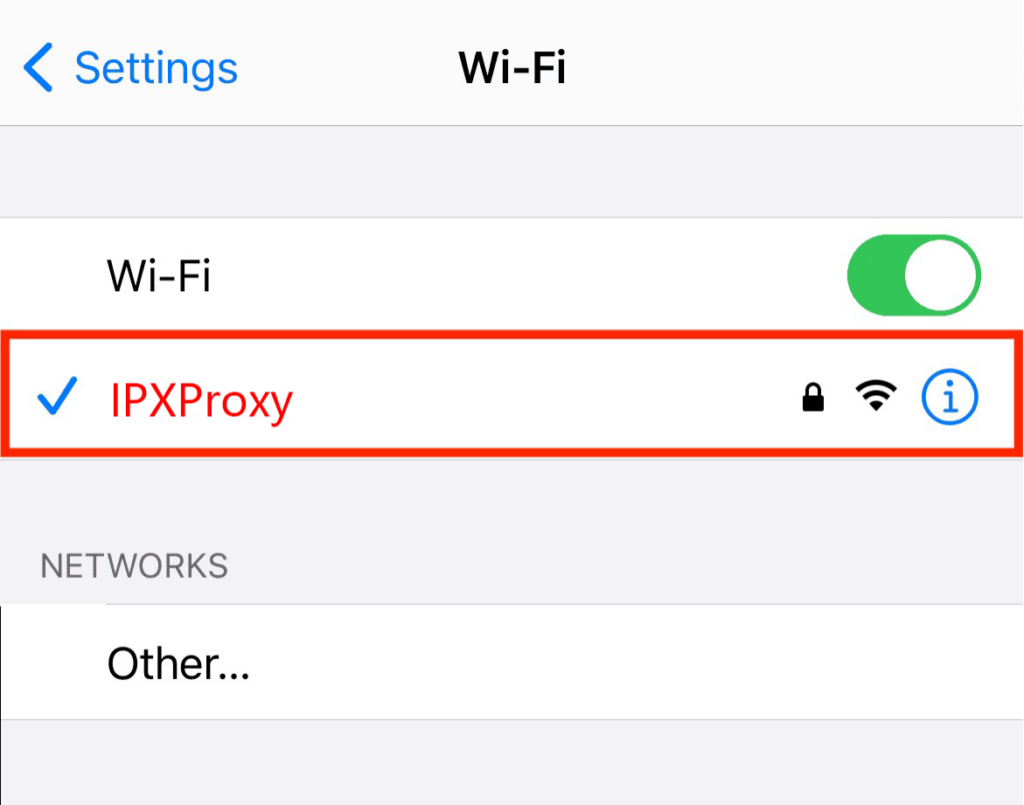
Step 3: Select your Wi-Fi network and click on the blue information icon next to it.
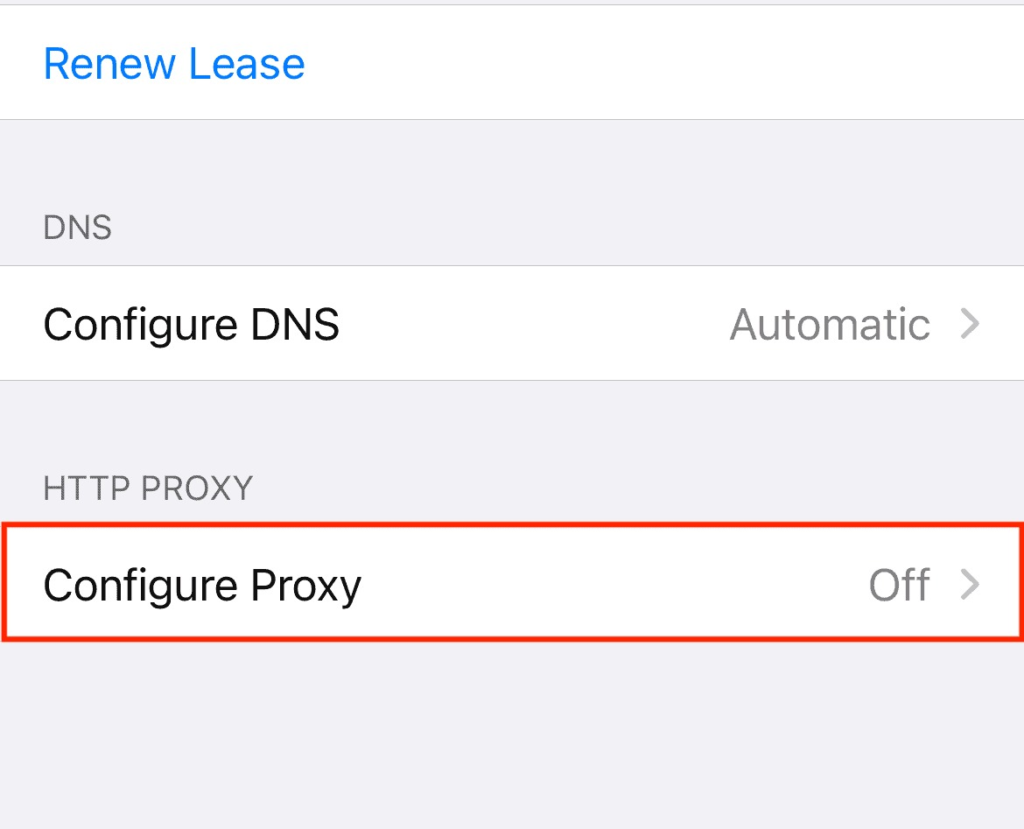
Step 4: Scroll down to HTTP Proxy and select Configure Proxy.
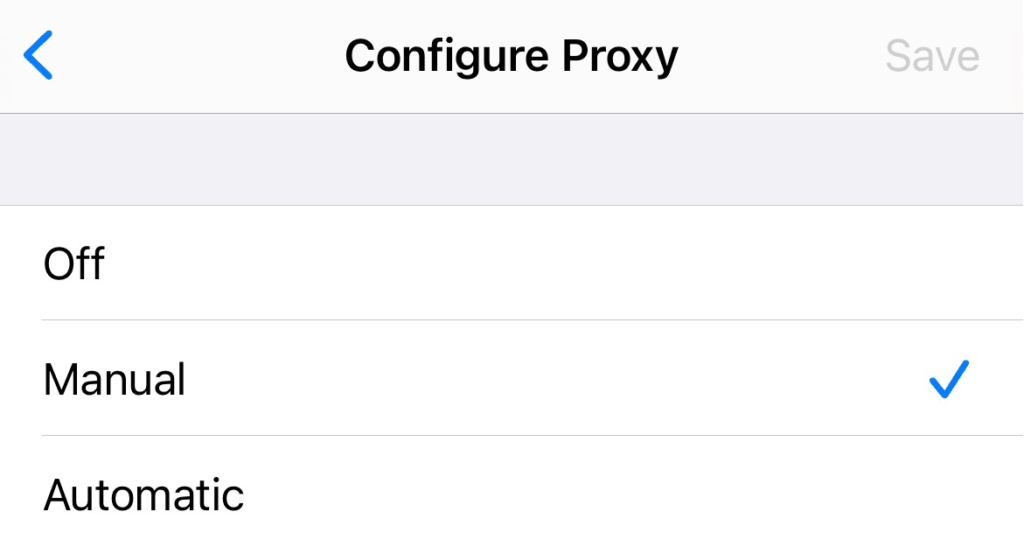
Step 5: Go to the Configure Proxy screen and click Manual Settings.
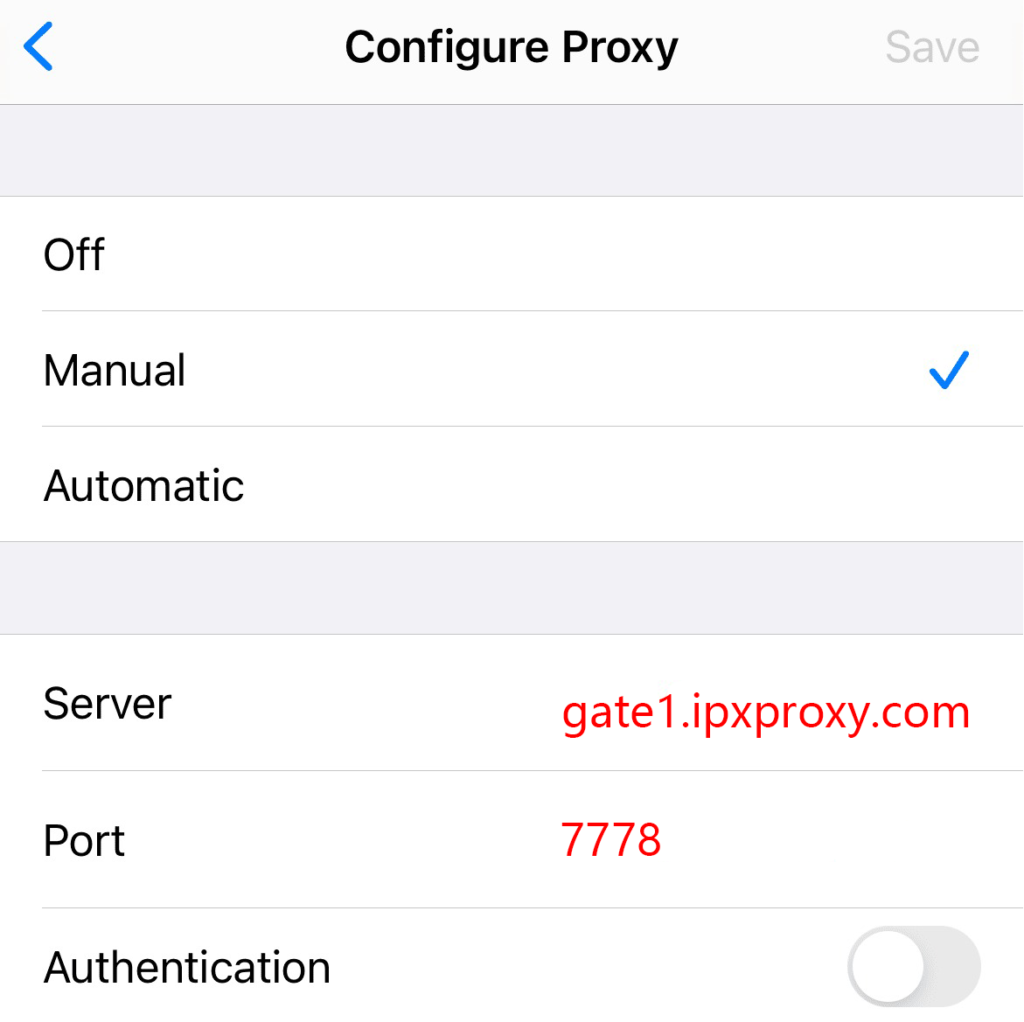
Step 6: Enter the proxy IP details, including proxy IP address, port.
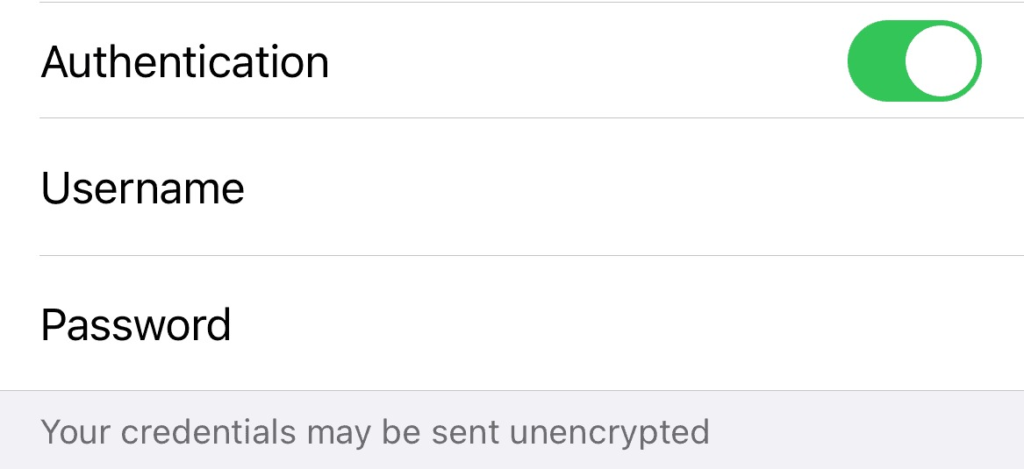
Step 7: If you are using whitelisting IP technology, there is no need to take any other measures. If you are using a proxy IP in accounted mode, check Authentication, and then enter the proxy account and proxy password.
How to find proxy IP address on iPad?
After the proxy server is set up, your request will be sent through the proxy, thus masking your IP address. You can access the target website from your iPad. If you can access it successfully without any interruption, the proxy IP setting is successful. If you can’t access it, you can determine if you are using Proxy IP by looking up the IP address of your iPad. It is easy to check your IP address through some web sites or tools on the Internet.
How to turn off the Proxy IP on iPad?
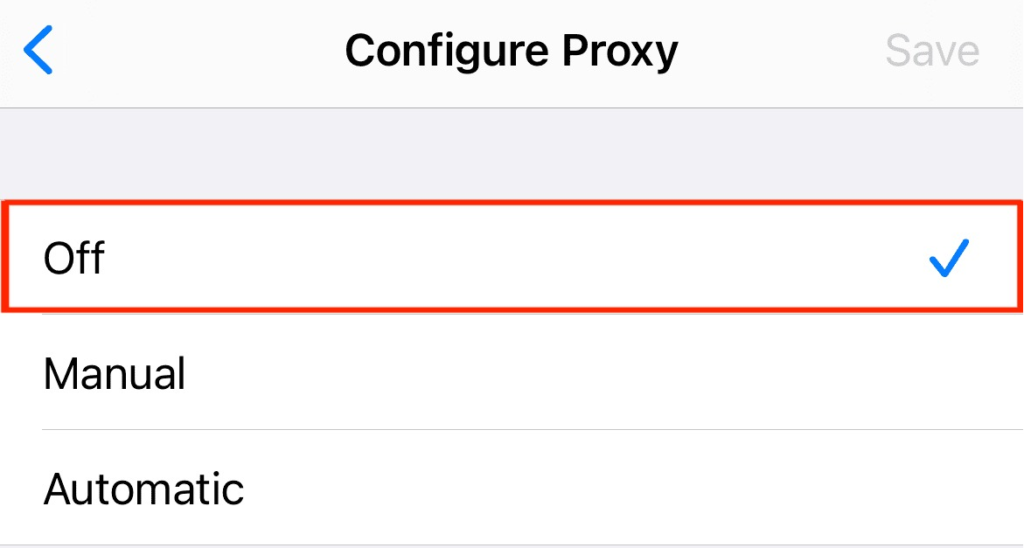
Configuring Proxy IP on iPad is a relatively simple process, you can easily use Proxy IP by mastering the method. Of course, if you don’t want to use Proxy IP on iPad, you can follow the same steps, select “off” in the three options of Configure Proxy, and then click Save to save it.
Conclusion
Now you know how to configure proxy IP on iPad. If you follow these steps, you will have a secure internet browsing experience. It’s worth noting that iPad only works with HTTP(S) proxy, you can’t use SOCKS5 proxy. If you need to use this type of proxy, you can configure it through several tools.


 {{item.label}}
  Buy Now
 Contact Sales


